Thursday, August 12, 2010

Cool Cat & Glue and Gloss Tip

Heya Peeps, Its been a long week. Try as hard as I may, inspiration had taken a vacation. But hopefully with this card, things would change. This cool cat is a free download from Hambo Stamps, I love their quirky sentiments, the fractured funnies and limericks..too awesome..
To celebrate the fact that we purchased a new printer (DH brought it for his legal work, but when he doesn't use it, it is MINE!!) I made this card. Love this cat..especially his grin! :D

The image was there, now I needed the sketch. Jaya came to the rescue with a bonus sketch for  her challenge blog, and I loved it. And it is summertime at Simon Says Challenge blog :D. What is better than a cool cat!!

This is her beautiful sketch, and here is my take on it.


There's not much to explain in this card..except for the white lines on the sentiment. Those are cat-scratches made by this cat while sighing in happiness (are you hearing that nasty sound of nails being scratched on the blackboard? I'm sure you are..and you are welcome) :D

Image colored with watercolor pencils, and As usual, my black sharpie and white gel pen. And those rounded corners on the image are made with Shilpi's cut -n-tuc rounded square template.

The sentiment in printed (of course) and says "Purr-fect".The fur-font was purr-fect for this card!

And what would I do without my glue and gloss..I had to gloss his shades!!

I'm so happy to see, everyone's cards are having this glue and gloss. So my tutorial wasn't entirely funny!! It did help some people. And speaking about Glue and gloss, Shalini and I discovered through trial and error, that this will smear your sketch pens, especially your Faber-Castell. So learn from our mistakes, don't make your own!!

And another experiment that I tried was using it as a tacky glue (temporary adhesive) on my unmounted rubber stamps (even the nylon ones). It works. Not so great, but enough that you can stamp the image. It will stick to CD cases, your acrylic blocks. Just apply glue and gloss to the back of your unmounted stamp, just like with the images, let it dry overnight and use it on your block. One tip, press a little hard on the stamp to stick it before you ink it up. Though I still want sheets of EZmount, till I get those, these will work better than double sided tapes! And if you want to remove this glue, scratch it off and it comes off very easily. No harm to your stamps! Try and let me know.

P.S. did you notice the little butterfly on the top, where my blog address is displayed? :D

Friday, August 6, 2010

Mini-tutorial

These tutorials are a product of extensive reading, researching and lots of time spent on making them. Please do not copy, or share on your page (for promoting your items in your shop) unless I give you permission to do so. Please ask nicely....I won't say no...but you need to ask.... You can link it on your blogs if you have used these tutorials...please share the link with me when you do use these tutorials...I would love to stop by and see what you have done! 

Ok, so mini-tutorial is a misnomer, its a micro tutorial!! Ok, not even a tutorial, its just a demo...yup! that's the right word...Its a demo of how the Hobby Ideas glue and gloss works. I've gotten quite a few emails, asking me how I use it or what is it.
Essentially its a Decoupage glue, and when dries it gives a clear glossy finish. It is in essence what the Glossy Accents, or the Judikins Diamond glaze does. This is how I start.
(click on any picture to see it full size)

 My weapons of choice, 3D glitter glue- ice shimmer (TIP - Pick up from the shimmer series in the 3D out-liners, they're gorgeous. superfine glitter, I still have to find the yellow shimmer, already got blue, pink and ice )The ones that say glitter are too chunky, will work only as out-liners)
ETA : another tip about these glitters, they will stick to any other paper that comes in contact with it. If its on the card, it will stick to the envelope, if its on an album it will stick to the previous page. Better to give it a coat of gloss so it does not stick.

Get your image colored, and if you want glitter on it, put the glitter on first.


I just apply tiny amounts and then spread it out with my fingers.


 Give it few minutes to dry and then get your glue and gloss.


 It looks like glue, but will dry clear. Apply in a thin layer but give it good coverage.


This is one wing covered. Make sure there are no bubbles. Take pleasure in popping the ones that do find their way in. 

 These are all covered, snow white beauties, waiting to dry. Don't do like I did for the green butterfly, its all podgy, if that's even a word. Give it a smooth coat, like the second and third butterfly.


At the end of one hour, the edges will start going from opaque to clear. ( yes, I did get a bit of bubbles on the green one) 

End of 3-4 hours. Do your best not to touch, no matter how much you itch..you'll leave your finger prints behind.
At the end of six hours All glossed up. I kept it out overnight since there was no light to take a good pic. Took this before I gave my DH his breakfast. And he was quick to compare, "butterflies over me?" and I said, always!! And then he too was a fan of the butterflies!
This doesn't show the gloss in its full glory, those who have my cards will tell  you how great it is. 
Another pic just to show the gloss.

Hope you can see the glaze. So that's it, my mini-micro-Demo. Go out there, buy yourself some glue and gloss and have fun.
P.S. Hobby Ideas is not compensating me enough for the stuff I buy off their shelves. They should. Are you listening? or Reading?

Thursday, August 5, 2010

OLW#14


I almost missed doing this challenge. Not that I didn't have time, not that I didn't have ideas, not that I was busy. It was just that the rain Gods were so happy, that sun didn't show its face for 4 whole days..and it rained like crazy..plummeting the temperatures...who was I to complain!! I just snuggled under the blanket and dreamt of making cards...whereas my butt didn't go anywhere!!!

So thanks to Daisy's arrival in Susan's life(that might not entirely be the reason, but Daisy is a cute reason enough) that this weeks OLW got delayed and I finally moved my butt from under the blanket!

Before you get bored with my chit-chat (I'm in a very talkative mood today), tomorrow's post is a mini-tutorial on using the Glue and gloss. I've got many queries as to how to use it and etc, so figured might as well show you how. Stay tuned..!!

This week was to be a square outline card, this is where I fumbled. Not really grasping the meaning of outline image ( I could have just asked Susan, but for that I had to move my butt of out the blanket) so I just took a chance that what I made is what Susan asked us to make. Hopefully..

OLW 14
I uncovered a clear set of butterflies I owned, and didn't use cos they were too tiny. Too tiny to be used as main images, only as accents. So here I needed accents. And this card is trial no3. The other two are waiting for salvation...
This is a tiny 4x4 card. Notice how I left the butterfly in the PP behind! Yeah, I'm trying to show off!! :)

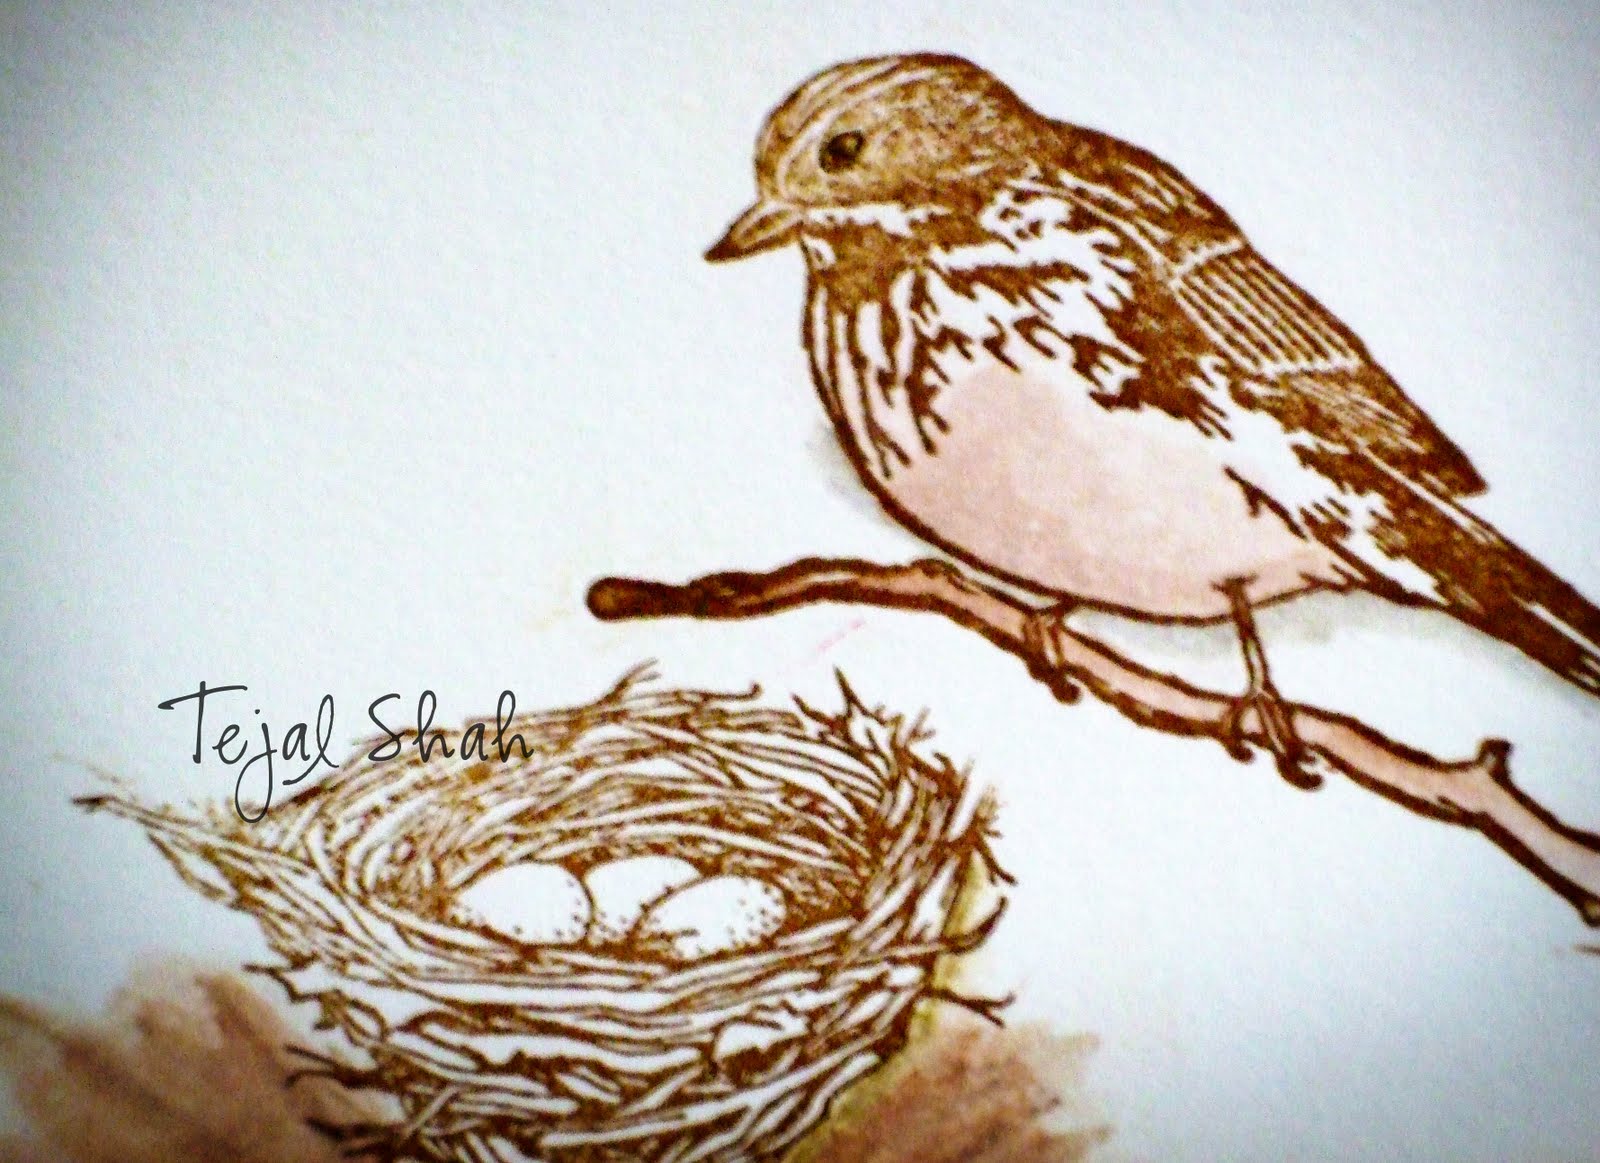
The next card was an afterthought, I'd won a set from Lizzy Anne designs, but this set did not motivate me. We just didn't belong together, until now. When I sat to make this card, I didn't want to color it. Its only highlighted!


Plus I made a muck out of the nest, I wanted a tree of sorts on which the nest would rest, but whatever I did I just looked like mud, so I made it into mud. There is only so much I could do to salvage this card. I just didn't want the nest to float in mid-air. Many don't care about such things, but for me it would be a weird world where the nest was floating in mid air, even on a card!!!

I have to say , I love  Lizzy Anne designs stamps, the rubber is beautiful. It stamps insanely gorgeous, and if money would grow on trees I would have all their stamps, maybe not all, but most of it. I love red rubber, any-day compared to clear acrylic, but that is a whole another post!

All I colored was the mucky ground, the bird's underbelly, and gray shadow under the bird. And highlighted its eyes..it looked blind before I did that!! So that's it from me.

And you thought I quit blabbering! Not yet, at least not before I show you one stunning RAK I received in the mail. Little miss Spardha (can't help but call her that, she's not even out of high school) sent me this gorgeous piece of work, it was hard to photograph since it was an acetate card, but I've been just staring at it since yesterday!! (Doing the happy dance!)


And if you want to see a ghost, peer closely at the acetate, you'll see my shadow!!

Tuesday, August 3, 2010

Welcome my friend to the blogging world!

This is just a small post to welcome Priya to the blogging world. I've known her since more than 2 yrs now,  . She loves creating and gives from the heart! That's what makes her so special. There are always  wonderful words from her on everything I make..and well her work inspires me so!  (I'm sure she's telling me to stop right now)

After bugging her for so long to start a blog, she finally has one! So please stop by her blog and welcome her to the blogging world. You will love what she creates! Here is the link to her blog, Rock, Paper, Scissors!

Here is one of her gorgeous cards! I love this one so much, its just soft subtle and beautiful.

Welcome to the blogging world Priya, hope to see tons and tons of great work from you!

Monday, August 2, 2010

Friendship Day!

I had kept this post in the draft for so many days, just dying to hit the Publish Post button! But had to be patient, lest people got a whiff of what I was up to!! Been on a card making spree just so that they reached in time for Friendship day on 1st Aug. I'm big on such things, I love giving. I've had a couple of peeps tell me, why waste money on something that will be thrown out a few days later! But its the libran (even though I'm a Libra-Scorpio cusp, I firmly believe that I am a libran :D )  in me, that refuses to give up!! And now finally found a bunch of peeps who know and appreciate the work you put into your gift, its a wonderful feeling when you know the surprise they'll have on their face!! So these goes out to you my favorite peeps! Thanks for being my friends!!


These are the fastest and the simplest cards I've made. Made 6 in 2 hours! They're that fast to whip up! And since everything was with measurement, things went like assembly line!! Took this sketch from CAS76 as inspiration. 
I've had this DCWV black and white paper pad sitting for a while, so thought this was the best time to     showcase colors on a black and white background and it worked perfectly!

I did get carried away with faux stitching but I guess its my in-thing for now. For a while it was inchies, then came CAS cards, then faux stitching. I don't think I'll tire out with these though, they're too much fun!! Sorry about the not so great photos, took them fast before sealing the enevelopes at night while watching Criminal minds! I don't like that show too much, wish White collar or Castle was back on, it was fun, this one is gruesome!!


A big Hug to all my other blogger friends. Thank you for stopping by my blog and letting me know that you think of me from time to time. It means a lot!! Thanks for being my friends peeps!!

Sunday, August 1, 2010

A beautiful RAK

Got this beautiful card a couple of days back, and had to show it to you all...it is so gorgesous. Love the little bling on it, and the beautiful sentiment. I'd sent an indian version of Coluzzle to Shalini and she sent this back with loads of love!! I can see the template is well used!!

Love the little bling on the envelope as well! Thanks so much girl..

Will be back later to post the surprises that went out on Friday.... Happy Friendship Day to all of you!!

Thursday, July 22, 2010

OLW #13, Christmas in July

So I took the theme for this weeks, OLW literally. Built my snow man in July, so guess what will happen if you build a snowman in July? Won't he melt?

I got this idea from Susan's description of the heat..sounded almost like the summer we had here with temps over 45C (115F) with sweat trickling down to places I would not want to mention on this blog (go ahead, imagine if you must)

This snowman image is the one I got from Michele...(Thanks hun, you are the reason I have so many stamps and why I keep falling in love with this hobby) I don't have any other Christmas images and thought, might as well as make it funny since I didn't get a chance to make a funny OLW!


The original snow man is smiling,but I made him frown since he's pouting about being put in the sun in July! He is  melting too, I also added an extra puddle! I ended up misjudging the placement of the alphabets, so didn't get place to stamp the profanities I wanted to..so leaving it upto your imagination! (lol)

The sun is a tiny peg stamp I brought from hobby ideas, love his wicked grin..and his cool shades!
And here's a close up of the Snowman himself..

 Pretty happy with my water coloring over here.

So that's it for my 3 post in 3 days...phew..I'm on a roll ... Do check my previous 2 posts if you haven't.
And again thanks from the bottom of my heart for all your wonderful comments, they make my day...

Wednesday, July 21, 2010

Butterflies again!

ETA : This is the second of my two posts in two days, pls scroll down for my older post. Not many comments! :(  Peeps your comments are what makes me create new things everyday...Thanks to all for all their encouragement and love..{{HUGS}}


 Don't know what to do with my butterfly obsession..I just love sparkly butterflies..anything that flies and sparkles..if I have a kid and if the brat would stay still, I might cover him/her up in glitter too! I already have plans to make these when the time comes!


Aren't these the most gorjjus feet ever?  sigh! Might do that for my feet too! 

Ok, now on to my butterflies. My sweetest newest girlfriend Manasa sent me 3 whole pages of butterfly print outs coz I didn't have a laser printer. I just resized the butterflies on photoshop and emailed it to her, and next day I get beautiful butterflies on paper! Thanks girl (oops!) Straight away got down to coloring them..and these cards hardly took me 10 min-to make..

So here's the first one, 

                              
This is a bigger version of the butterfly, the trail is from a the PTI set,  Little lady and the sentiment is from Heart and soul Rubber stamps!
Butterfly colored with Sharpies, highlighted with glue and gloss. and just a little bit of bling with rhinestones near the sentiment.
Love how the gloss looks. Beautiful ain't it? Since there was no sparkle on this, I went a tad overboard with the sparkle on the next card...

These are the smaller size butterflies, colored again with Sharpies, and over blinged with ice-shimmer glitter from hobby ideas. Sentiment again, by Heart and soul rubber stamps and 3 little dew drops colored to match the butterflies.
These too have a layer of gloss over it..they're over shiny..but I love it!

On a  completely different note, The Stamping Bazar is having a DT call. Give it a go..and drool over the art work of Marina Neira, the illustrator for stamps of The Greeting Farm. Love her images.

Good luck

Tuesday, July 20, 2010

Annabelle stamps

I won a stamp set from Annabelle stamps two weeks back and was itching to play with it..It had a beautiful tree image that had my brains whizzing..superb quality of stamps..almost as good as PTI ( I do own one set of PTI stamps, got them in a swap)
So without much chatter (like I always do), here's the card.


That tree had me thinking of tyres hung on trees and used as swing by children, so changed the original stamp a bit to put in a tyre cut with my circle cutter..works like magic..

Brown ink , green ink from hobby ideas,  and birdie stamp from Spardha  (I bought them from her)  and the sentiment is from Stampin Up. Kept it pretty simple . The tyre is covered with glue and gloss(hobby ideas) for that gloss that I love now.

And the birdie has been paper pieced, but its too tiny to tell..

And on to another card, this one I got from Spardha as a BRAK (back Random act of kindness) for sending her the envelope tag mini album. I love this card Spardha, thanks a ton for making my day so happy! {{{hugs}}} to you


And just so to mess with you, putting a sneak peak of my next two cards. I'll post them tomm..


Ok, so both are butterflies! Whats new? Nothing! Just loving them a whole lot right now!

Thursday, July 15, 2010

Hey Chickee

Long time no post..sorry! Wasn't keeping well..I was down with severe back spasms, couldn't cook, couldn't sit, couldn't sleep properly. Still on meds, but feeling a bit better...back to exercises when the pain is gone..
Since I was feeling better, decided what better way to cheer myself than make a card!

So here it is, its with the sketch for the  FTL-98 and CAS-75 (use dry embossing) and CAS-tastic Challenge (its SIMPLE). My card uses, Stamped Images, Inked edges and Embossing.

I've had the Fiskar's texture plates since 2 yrs, but really don't like the results. But still decided to break it out once again and enjoy a bit of embossing!
I've also had this beautiful Tiffany blue color paper, so decided to use it. And this cute stamp? Its being used for the first time on a card in 2 yrs! I've inked it up and sent images to many friends..but never used it myself...I think they're finally happy now..


 This is the sketch  on which I based my card, I was supposed to keep the black panel a single piece, but while watching CSI I ended up trimming them into 3! Kinda forgot the track of the sketch!


Colored using water-color pencils, my usual signo white gel pen and sharipe ultra fine black marker for the faux stitching.

Should be back again soon with a card for Simplicity challenge! Working on that soon.
On a gleeful note, I just won two stamp sets! One from Lizzie Ann Designs and one from Annabelle Stamps (Australia)


 Just a closeup of the naughty chicks!
Related Posts Plugin for WordPress, Blogger...