Wednesday, January 29, 2014

Musical Birthday Card

This is the last of my backlogged posts...that never got done....This project was made way back...In August...and I didn't blog it....Gaah!!

It was to be for a guy who loved music...and it had to be huge!! so This is a A4 size card...yeah..bigger is always better...or so the clients seem to think!!

Each piece of the guitar is hand traced and cut from a free image on Google.

Background was made with my favorite sprays .. Mistries From Die Cuts and More.
The music stamp is from Kaisercraft..one of their texture stamps...

And I did use real wire for the strings! some beading wire.


The Happy birthday and Rockstar is a die cut...from cuttlebug baby face alpha set.


And the stars are glittered and topped with glossy accents!! The whole guitar has an outline of silver glitter pen!!

Hope you liked this Larger than life card....Do let me know if you have any questions!

See you without any more backlogs! :)

Monday, January 27, 2014

Stencilled..Bonus Class

I'm taking this AWESOME Online Card Class called Stencilled...and it is amazing...beyond amazing...
I have always been intimidated by stencils...and this class makes it look so easy!!

I love the fact that they are willing to share so much of their knowledge... and its not just in classes...even on her regular blog..Jennifer inspires and teaches so much on each and every post.

No one can inspire me like she can....I have to give an example of their large heartedness.... the class runs for 4 days...and most of the videos were shot before the CHA happened. Yet, because there were new products that would work with this class, Jennifer made a bonus video just to share that info..  Show me one person here who has that big of a heart. Anyway...that is digressing from the point...

Here is the first card I made coz, I just had to. Its Jennifer baby...she inspires and I create! This is a CASE of the card she showed on the class today. I wanted to make cards for day 1, and 2 but being a weekend, I just don't find the time!


I just have two stencils...and this is one of them....and I love how the card came about...and its so easy to mass produce!!  After clicking the picture, I saw that the heart was a bit wonky!! ah..what the hell...its handmade!! :D The perfectionist is taking a back seat for a while!!

Base is 6x6 from a card kit on sale at Hypercity!!  Of all the places...200Rs. kits from Itsy bitsy being sold for 40Rs.!! With envelopes! Score!!


I am absolutely in love with my new Wink of Stella Glitter Brush pen....this is with the glitter and a layer of glossy accents on top!

To give a faux chipboard look and feel to the die cut, I have layered 5 layers of the die cut...I think you can see under the B, S, O.


Any questions...shoot below!! See  ya soon!!

Friday, January 24, 2014

Home Decor Project - Hanging Photo Frame

Having posting everything to Facebook these days, I often forget that I've not posted it to my blog.

This is the second Hanging Photo Frame I have made! This was made in December and I still haven't  posted the first one as yet on my blog...but it is up on my Card Shop Blog...you can check it out there...and if you have any queries, feel free to email me or leave a comment. (if you leave a comment, please make sure to leave your email address else I cannot get in touch with you! )

This was a custom order for a friend.

Individual pictures.
I have loved using my Perfect Layers Rulers in this project...As I love having the perfect mats!!  And this tool didn't disappoint!
Loads of supplies have gone into it...so if you need something specific....please email me...


This was soo much fun to make...and I'm glad I was able to send some sunshine and smiles to someone!!

Wednesday, January 22, 2014

Standing Flip Photo Display Album..

,,,phew!! That was a mouthful of a title!!

So...(do I begin everything with Soooo!!?)  I have challenged myself to blog everything I make before I post pics on facebook...and also to go and comment on at least 10 blogs in a week...more is better....
I feel no one reads blogs these days....its the world of just "Liking" everything and leaving everything else unsaid. I realized that just "likes" don't boost the confidence of a crafter...its the little comments at the end of the post that mean the most....Sure it will take effort on my part...but I'm going to blog more...encourage others to blog more....its more than just sharing your creations...its about sharing who you are and where your creativity comes from!!
Phew...I wanted to say these words since soo long...laziness came in between...not anymore!!

This Photo Display Stand is made from a tutorial from Marla at Lake Avenue Designs..check here for the complete tutorial..  No ribbons, no butterflies, no flowers and no laces... would that make it easy or hard....!! You decide!

I have changed a few things.... My pages measure 6 inches across instead of 5 in the tutorial...I wanted more space...And I made my own base to keep it standing...pics to follow..


This is how the Album will stand...I adore the sentiments....They are from Technique Tuesday..Incredible...I love Ali Edwards beautiful handwriting fonts!! The main happy birthday is a file from Silhouette store...and the background shape..Couture Creation die from IB Store...Cupcake from PTI

So each page flips over to reveal a photo under it...

Here's the first flip....I've kept the embellishments, the extra nonsense to a minimum...bcoz I wanted the pictures to be the highlight of the album... not my supplies or my dies!

 And this is where the arrow points too..I wanted a cheeky way of saying the sentiment, but hiding the main word at the same time!! I don't know if that makes sense to you!

I loved creating this page...cutting the letters out with my new toy...Silhouette Cameo!! It is awesome!! I mainly wanted it for the titles...I used to get fed up of not having the perfect font dies or the time I would waste in cutting individual alphabets one after the other....This baby is so worth if only I ever cut out alphas all my life!! :p

This photo was so adorable, that it needed its own Polaroid frame...so this frame is handcut! yes..I do use the scissors now and then!! :p
Stamps from Lawn fawn..my silly Valentine....Stars from MFT- Stackable stars


Again embellishments to a minium....the photographs speak a thousand words...and I wanted them to be the focus... The Say Cheese is again cut from the Silhouette Cameo... The red Tabs are MFT bracket die...the are small pullouts for secret messages (wink wink!)
And the last back page....
I wanted something cute and whimsical on the last page...this is the back page. The banner is a SC cut file.. Stars again MFT...bike is a Lawn fawn stamp - Cruising through life.

This is where I made my own changes....The tutorial had a ribbon stand...I made it my own way....

I made this stand and this is how the album will stand.... if you need a tutorial...leave a comment..and I will make one for you...

So this is how the whole album came about...In 3 days...its a record of sorts for me!! :D

Any queries about any supplies or for making it...leave a question with your email...I can't answer if your email isn't connected to your blogger account!

See you with more backlog posts!!

Friday, November 29, 2013

Obsessed with mosaics and butterflies!!

I truly am!! Obsessed...with the beauty of Mosaics and fluttery butterflies!! If I wasn't I wouldn't whip up 3 more mosaic cards featuring butterflies! hehe!!

So here they are!!

 This card had me in knots...I wanted opposite contrasts in each aspect of the card....the red panel on the left...has a black mat..and a black wing...but the inside of the butterfly is red...
And similarly on the right side...
It took me a  while to figure out how I wanted to do it...and then..it just came along fabulously!!

Sentiment is from a Technique Tuesday stamp...By Ali Edwards!!


These two are another that I whipped up....You can see and read step by step how to make these on the Crafter's Corner blog...Click here for the card on the left....and here for the card on right!

Hope you enjoy these crazy butterflies of mine!!

See you soon with some more madness!! 

Monday, November 11, 2013

Mosaic Butterfly

Hello people. Its been so long that I made a card for no reason at all. And after making one today...I really feel so glad. I wonder why I never took the time to do so.
I just watched a wonderful video from Jennifer mcguire. She made one with an outline die and one solid die. The only die that I had which could match those requirements was a butterfly one (huge grin :D)

So this is that card.
The shape is cut from reverse wonky rectangles.
Butterfly dies are memory box
Sentiment penny black.

Love the embossing of the frame. And the stain glass or mosaic look of the butterfly.
So what do you think? Do leave your comments. 

Friday, October 11, 2013

Celebrating Sindhu's Anniversary!!

Hey everyone...
sorry about the lack of posts on my blog...I will be updating it soon...But before I do that, I had to post this.

Sindhu Jay is celebrating her first Wedding Anniversary and her Blog Anniversary this month!! (her blog birthday was in June)
And she asked (not asked, demanded) that I host a challenge for her blog! And I couldn't say no!!!

So here I am with my challenge for you!!
"ABC - multiply it by 3 "

That's my challenge for you all....
Pick any letter of the alphabet....
Make a CAS Card and use any 3 elements that begin with that Alphabet.
Eg... if you pick S - you can use Sand, sunset, shine, ship, shimmer, etc

Go crazy, but let it still make sense. Please don't use R for rolled flowers.
Simple isn't it?

You can go over to her blog and link your cards there...

And for an inspiration...and a card just for her!!

 She loves this sentiment...and had asked me a long time ago to make a card using this set from Simon Says Stamps...Apothecary labels..
So the first card made with this Set is for you girl!!

The glitter frame is backed with black die cut to give a bit of shadow! 

In retrospect, this butterfly feels out of place, but I wanted to put it in....my newest Memory box Darla die! The Die is Spellbinders fleur di lis square, and is coated in Pixie dust glitter!

So this card uses the alphabet B - Blue, Bling and butterfly!!

Do hop over to Sindhu's blog, congratulate her and do join the challenges. There will be 4 in this month...and you can submit all October!!

Big big Hugs girlie...Wishing you and Prajay a very happy Anniversary month!! :D

Thursday, September 19, 2013

Quick Tip on Embossing

I just thought I'd do a quick post on something that was bugging me...and am not sure if any of you had the same problems as me.

Its about the long time taken to melt the embossing powder by my Ranger's Heat Gun. This is my 2nd heat gun...previously I had used the Marvy Uchida and that would melt the powder in seconds...but it would also blow the powder all over my work surface. Which was a pain to clean afterwards! :(

So I decided to pick the Ranger's Heat It, (I got mine from Crafter's Corner) knowing it was a low noise, less fan speed kind of a gun.
But with that low fan speed came a drawback...it takes longer to melt the powder...the longer I used it, the more surfaces under it I melted. The reason is that, this is low temp heat gun....and the others are high temp melt heat guns...that is why this heat tool takes longer!

Thankfully I saw in one videos that I watch endlessly at nights (am a night owl and an insomniac) and it popped that this was what I needed.. , and I think this is my perfect solution. So I thought of sharing it with you!

What I did was take an useless corrugated cardboard sheet (see hoarding helps!!) and wrapped the piece in aluminum foil .. roughly an A4 size cardboard. And attached two wooden pegs to it...No metal and no plastic please...metal will heat up and plastic will melt...wooden pegs only..

What ever needs to be embossed, goes under the peg...so that it does not fly away...


And how it helps...when you're heating from top, the foil also gets heated and heats the paper from below...making the process of melting your powders faster....Its such a relief to have them melt faster....plus with the cardboard under it I don't melt any of my surfaces!! 

And your work gets done in half the time!!! just showing my pretty peg pins!! 
 
I would recommend this heat gun any day, its small, versatile, and makes so less noise than the other heat guns...plus this version works on the Indian voltage!! What more do I want!!

Hope this little tip helps you!!

Friday, September 13, 2013

Blending with Faber Castell pencils and Odorless thinners

I finally managed to shoot part 2 of my Coloring with Faber Castell Bi-colors. In part 1, I showed you how to blend those waxy pencils with a blender pencil. You can watch it here...But those blender pencils are not easy to come by.

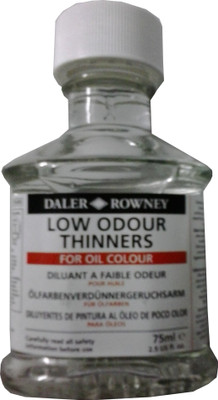
So I had set about searching for an alternative method, and it  took me so long, because I had to find local versions of  blending mediums...and I finally found it...and I love the results I got with it....What I am using are oil paint thinners...called OMS (odorless mineral spirits)

These thinners are called OMS because they are odorless...

Most of it is self explanatory when you see the video


I do have to give credit to Amy R of pariepaperink, from whose video, I got the idea of putting the sponge in a baby food jar.

Here are the samples that I colored in my video...I think I really like this method of blending the colors.
Even better than watercoloring!
What say?


And here are the links to the various products I have mentioned. The Daler Rowney low odor thinner


Another substitue for this can be the Camlin Distilled Turpentine, but which as I said stinks a ton...It has a strong pine odor...if you don't mind that..you can pick that up too at your local stationary store. The camlin turpentine wouldn't be called an OMS because it has a strong smell or odor. 
 I'm just sharing the pics coz sometimes you may forget the names of the product, but you'll always remember the pictures!! :p

Also there is the Winsor  Newton Sansodor ..same as the Daler Rowney product..I haven't been able to find it anywhere here, but if you do get that, that's a good option too.

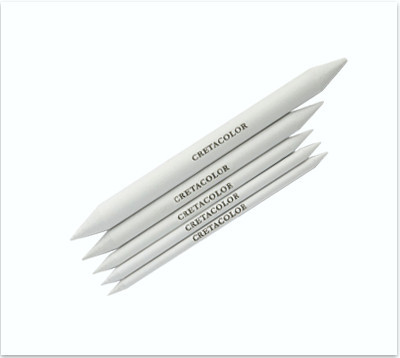
 Blending stumps/sticks (paper stumps) I have found mine in my local craft shop. If you can find, that's good, but you can also get the set from Creatacolor which is of a higher quality.  


Papers I use are Brustro 200 gsm (not 220 as I mention in the video) 

Hope you do try this method...
Feel free to leave your questions and of course, do leave your feedback. Which is what I thrive on!! 

So what next would you want to know...I'm searching for topics for my next videos....

Saturday, August 31, 2013

CAS cards - Part 3

Finally here with my last 4 CAS cards from the CAS card swap at Swap Central.


 This is perhaps my most favorite card, since I ended up CASEing myself. I made around 15 of these cards for Rakhi and to send to some special people!  ;)
The flower and sentiments are Papertrey ink. Colored with FC Bi colors, and the embossing folder is from Craft Concepts, which I picked from my local craft store!! (hehe!! S don't be jealous...you can come anytime to my LOCAL craft store!!)

 I loved creating the background so much, that nothing I put in the front seemed okay. Its made from woodgrain paper cut and distressed and re-glued such that it looks like beams.
The banner and sentiment is Simon says stamp.
The butterfly- a cheery lynn die.

 A very simple card...a faux polariod frame and a CASE of Nichole Heady's card using the same stamp. Stamps and sentiment are papertrey ink.

Love love love this die...my absolute CAS favorite. Pattern paper is from papermania-newsprint collection.
Sentiment and "Absolutely: Die is from Simon says stamp.
For such bold sentiments, I love using my Archival ink from Ranger. Crisp and bold as it should be!!

 Coming soon... a video on Lindy stamp gang!!
Related Posts Plugin for WordPress, Blogger...