Showing posts with label tutorial. Show all posts

Sunday, September 13, 2015

Stamp Storage and Labelling

Gm Everyone!!

So by special request, this post is moved from Monday to Sunday. Since hubs is away for the day, I was able to sit and type it out!

So after my ink swatch book, I took on my stamps in the organization mode. I had been running out of space to keep them in my files. Files were getting bulky and cumber some.

Pic Source - Jennifer Mcguire.
This was an older Jen Mcguire method. It worked for a while and then I ran out of space. 
They could only expand so much and I had no more room for files.
So I decided to go the newer Jennifer Mcguire way. You can see her  original video here


Now I could find the exact same things here, but they cost a bomb. And I'm all for alternatives. I would not pay 600 bucks for 25 plastic sleeves, when I can find an alternative that gives me 100 bags for 100 bucks!

I kept searching for an option for Avery Elle storage sleeves. I did think of using plain plastic sleeves, cutting the top and making flaps. But I was not convinced the flaps would stay closed. And one of my blog buddies just convinced on that part. She needs to use a glue dot or a velcro sticker to keep the flaps closed. They don't seem to stay tucked in.

So my option was the ziploc bags. The size you need to look for is 6x9 size. Look for a good thickness. It will fit a stamp set easily and will fit into the storage box easily. It even fits the long MFT stamp sets. It won't fit the 8x8 stamp sets from fiskars or Altenew layering stamp sets. For that, I have to go and check other bag sizes. It's still a work in progress.

Then comes the labelling part. I was not going to spend 4k on a label maker and another 2k on its refill tape. I cannot simply justify that cost. Plus with my own label sheets, I can use whatever font I want!! :D


 I already had some A4 size label sheet. It was just one whole sticker sheet in A4 size. So how to go about creating those perfect looking labels that you saw on my post! 'm linking all the products I've used below. 

If you are using the A4 sticker sheet, you will have to cut the labels with your trimmer. That is a 5 minute work. Which is what I did. And stick.

Finally the dividers. Ran to my stationary shop and bought some cheapo Solo files and cut them up. There were some plastic pockets inside which I ripped out. You should have seen my husband's face. "You brought them up to cut them up??What is wrong with you!!"
Sigh!! Who will explain to these men how far our obsession will take us??


And finally my storage box. It fits 50-60 stamp sets easily. I have a few rubber background and other cling stamps to do. Which should be this week.


Sorry for the weird lighting on the photographs. Its a dark hazy day today.

So I really hope it helps those who are planning to organize. Trust me, if you see it , you use it. 

Product links (Affiliate links used, helps me earn a little extra something so I can do better research)

Lock&Lock Fashion Basket, Gray (HP265)
Solo CC- 101 Conference Companion (With Pen and Pad) A4 - Blue
NOVAJET 1 Label (Per A 4 Size Sheet) Multi Purpose Self Adhesive Labels (100 Sheets)
NOVAJET 84 Labels (Per A4 Size Sheet) Multi Purpose Self Adhesive Labels (100 Sheets)
 Plain SOLO CC-101 Files (set of 3)

Saturday, May 2, 2015

Organization - Ink Swatch tips and tricks

I am not was never a big fan of organizing things, but now after getting lost in my own craft room, I realized that I had to organize. And I started with inks, then stamps and then paper...or something like that!

Here is my ink swatch book..I have followed Jennifer Mcguire's Video (have linked to the video) but did not use her downloads. As the printer which could print on my high gsm paper was dead. So I made a little changes here and there. Will explain better below.

So after cutting all my papers into 2x2 inch squares, I started looking for a solid stamp. And I only had 3. So it was either a balloon, butterfly or a flower. Not hard to guess what I picked.

I was confused about what paper to use. I had 5 different types of whites that I use in my card making, but use Brustro mostly in my stamping. But now with Neenah Solar being available in India (YAY!! Thank you so much Priya!) I may change my stamping paper to Neenah too! For now I went with Brustro.(the link is for 2 packs)

I printed out the ink names and brands on MS word and printed on my regular laser printer, cut it into strips and glued it on the 2x2 swatch. And then I was ready to start doing my swatches.

And having the MISTI (check my previous post) made things so so easy!! It was just simply, ink, stamp, clean the stamp, ink again and stamp!! Simply quick and fast!!

Instead of posting a huge load of photographs, I just made a quick video showing all the inks I have and how I have separated them. As I buy more inks, it will change, but for now, this works.

This is how my folder looks. It looks odd because all colors look mixed up. They are not. They are on consecutive sheets.. In the video , I have put a white paper behind each sheet so as to give you a better idea. I still have to do my distress inks, embossing powders and maybe my mists in this folder..the possibilities are endless!!


You can see the Video on YouTube too! 

 Yes, I know you want to know where to buy those coin protector sheets from...Here is where I go them...from ebay. Here is the link  or you can buy from their website, here.

I did not order an album, since I didn't want a bulky folder on my desk. You can buy a D-ring album if you want to keep it in the folder.

So there you have it, my ink swatching system.

Do you have an inventory system? Would you like to share? If yes, I will create an inlinkz so others can find all the posts under one page.

I am surprised there isn't much sharing in our blogland. No one wants to share any info...if they find something new, its always "inbox me for details" I find it a pretty narrow minded vision. I have lost respect for a lot of people the moment I see, "Inbox for classes/inbox for details" especially considering they learn everything free on YT! Do I sound petty and jealous?? I hate unfairness. Had I been jealous, you would have never seen such sharing or enabling posts on my blog.Well ending the tiny vent on a jolly note, I spoke to a friend about it, and she simply said...Not everyone has a generous heart. Most are money minded. And that is where I find my solace. I am not them.
 To each his/her own...Anyhoo! End of my tiny rant! :P

Wednesday, April 1, 2015

Shake shake shake it baby!

Hello again,

I was Guest posting on the Lulupu blog a while ago, celebrating their 3rd birthday! I had shared how to make shaker cards, so I thought of posting it here on my blog as well. So let's go...its a picture heavy post though...

 Let me take you along as I create not one but two shaker cards.

I started with two, because I wasn't sure how I wanted to go with it...so I played with both the cards and it may go from one card to another, but I'm sure you will get there in the end, and hopefully not confused by it! Let's do the shake it shake it baby!


I started with a cake...stamped it in Archival ink and colored with my distress inks. The stamp is from Hampton arts and comes with a fabulous pennant stencil.


So now, I'm creating a background for my shaker card. I masked the cake with a post-it cut out.

The great part about this pennant stencil, is that it is SELF ADHESIVE..yes you read that right, no need to add masking tape to secure it down. Just peel and paste it on your work surface and you are good to go. Once you are done, just paste it back on the backing and it safe and secure!

I used two shades of distress inks to create my pennants..,shabby shutters and mowed lawn. (Please excuse that washi tape on my inkpads...I usually stick them on the inkpads after using stencils)

So this is what we get. Now this is where I went a little hay wire. I jumped from this background to the next card. Please forgive me for that. But here is where we start making the shaker component of our card.


This is my second card.. I simply masked off the edges with a 1 inch masking tape and used the pennant stencil to create a background. For the shaker window, I'm using a card piece which is slightly smaller than the background. You can use the same size card piece too, in this case
4 1/4 x5 1/2.
Using my exacto , I cut off an area in the center to create my window.
TIP - You can use your square dies, oval dies, rectangle dies, word dies etc., to create fancy looking windows too.

 Now, cut a piece of transparency the same size as your window piece, (you can use Vellum too).
Run some red tape/score tape down the sides of the window. Peel off the tape and adhere your transparency/acetate to the back to the window piece.
Dry glue is always better with glossy surfaces like vellum or transparency.

 Over the transparency, we are now going to create a space for the shaker confetti!! So use double sided foam tape and add it around your window frame.
Keep it 1/4 inch away from the edge of the window, you don't want the foam showing through.

The most important part I feel for a shaker card when you are using double sided foam tape, is to make sure the confetti does not stick to the sides of the foam, which is usually sticky. 

I love love my new EK Success powder tool...just run the brush tip along the inside sides of the foam tape and your confetti will never stick to the tape! I even brush it across the inside of the transparency so there is no static on the plastic.


I picked up some number confetti and just took all the number 3 from it...
and I glued a few on the transparency too!!

Remove the foam backing and stick your window piece on the background and your shaker card is done.

Now to embellish the card and ready it up!!


showing the scattered confetti


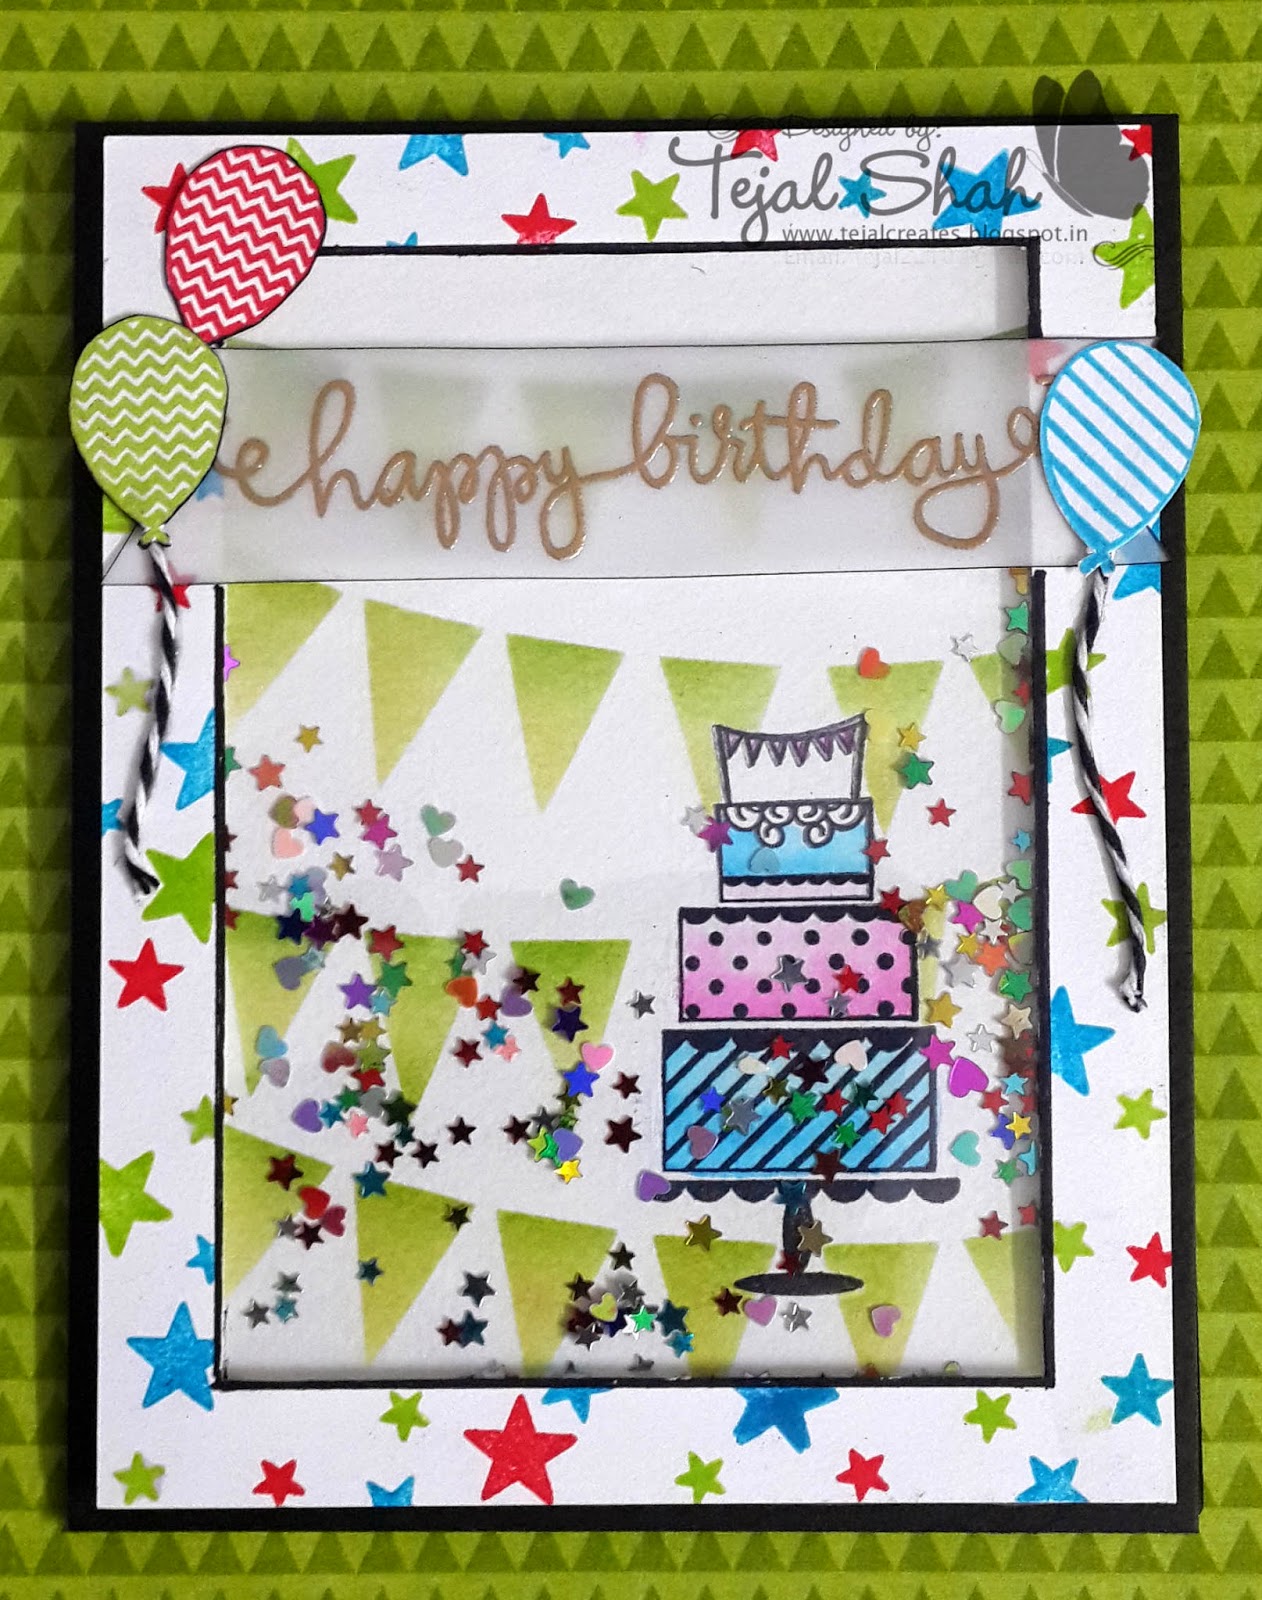
So here is my finished card...I took the 2nd  birthday cake (scroll back to the first picture) fussy cut it and glued it to the window.
Took a piece of vellum and gold embossed the Happy Birthday sentiment.
Stamped and fussy cut balloons, added twine. To finish up the balloons, I added Wink of stella in clear and glossy accents over the balloons!

The whole piece is glued on a black card base.

The piece which I abandoned in the 3rd step, here's how I finished that too..


scattered stars confetti


Here I took the window piece and stamped stars over it...stamped 3 balloons from the Hampton Arts set and fussy cut them.
Heat embossed sentiment on vellum, with Gold embossing powder and hid the glue behind the balloons!
On the right, is how the confetti shakes out!!
Again, this whole window was glued to a black card base!

And we are done!! If you are still with me, Thank you Thank you Thank you!!!

List of supplies,
Cardstock - White - Brustro 200 gsm
Black Cardstock - Local
Inks - Distress inks -Mowed lawn, shabby shutters, picked raspberry, salty ocean
          Archival Jet black
          Ranger dye inks - Electric lime, Caribbean Coast, Classic Cherry
          Versamark
Ranger Queen's gold Embossing powder
Stamps - Hampton Art birthday stamp, Simon Says Stamp - Clear Birthday ballons,
Hero Arts - birthday messages
Ek Success Powder tool, Olfa cutting knife, Tim holtz ruler, Tim Holtz non stick scissors, Wink of stella, Glossy accents.
Black Baker's twine

Friday, September 13, 2013

Blending with Faber Castell pencils and Odorless thinners

I finally managed to shoot part 2 of my Coloring with Faber Castell Bi-colors. In part 1, I showed you how to blend those waxy pencils with a blender pencil. You can watch it here...But those blender pencils are not easy to come by.

So I had set about searching for an alternative method, and it  took me so long, because I had to find local versions of  blending mediums...and I finally found it...and I love the results I got with it....What I am using are oil paint thinners...called OMS (odorless mineral spirits)

These thinners are called OMS because they are odorless...

Most of it is self explanatory when you see the video


I do have to give credit to Amy R of pariepaperink, from whose video, I got the idea of putting the sponge in a baby food jar.

Here are the samples that I colored in my video...I think I really like this method of blending the colors.
Even better than watercoloring!
What say?


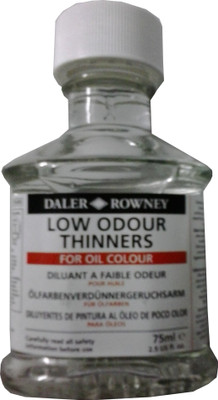
And here are the links to the various products I have mentioned. The Daler Rowney low odor thinner


Another substitue for this can be the Camlin Distilled Turpentine, but which as I said stinks a ton...It has a strong pine odor...if you don't mind that..you can pick that up too at your local stationary store. The camlin turpentine wouldn't be called an OMS because it has a strong smell or odor. 
 I'm just sharing the pics coz sometimes you may forget the names of the product, but you'll always remember the pictures!! :p

Also there is the Winsor  Newton Sansodor ..same as the Daler Rowney product..I haven't been able to find it anywhere here, but if you do get that, that's a good option too.

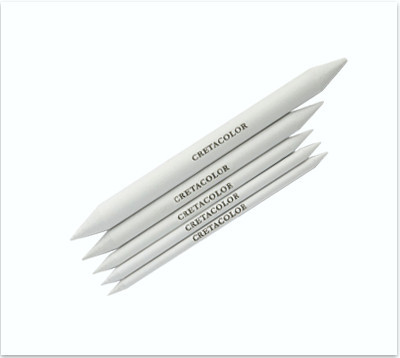
 Blending stumps/sticks (paper stumps) I have found mine in my local craft shop. If you can find, that's good, but you can also get the set from Creatacolor which is of a higher quality.  


Papers I use are Brustro 200 gsm (not 220 as I mention in the video) 

Hope you do try this method...
Feel free to leave your questions and of course, do leave your feedback. Which is what I thrive on!! 

So what next would you want to know...I'm searching for topics for my next videos....

Tuesday, July 30, 2013

Info Post | Faber-Castell Bi colors and a give-away

With the advent of Facebook, blogging certainly takes a backseat. If its out there on facebook, its done.
I am determined to not follow the path taken by everyone, but instead make my own way...and yet sometimes I end up following the herd!! (shame on me!)
Anyways, this video went up last week on facebook and never got around to posting here.

I do not really enjoy coloring, but because images call out to be colored and I cannot do a shoddy job. It either has to be perfect or none at all...and hence went deep into finding what will give me the best results within the limited resources locally. I remembered my Faber-Castell bi color pencils....and tried and what superb results!!


Since I'm on a bright color roll, I love going bright..but you can do soft too...Will be showing that soon in another video!! yeah...me and videos and talking!!! Scroll down for the video. 


These are the colors I used along with the Derwent Blender pencils. Which unfortunately are not easily available. I'm sure I've found an alternative to it. Waiting for it for reach me....its in transit. However...I did manage to snag the one set of Derwent blender and burnisher pencil I found here....its for 365 for anyone who wants to buy it. Email me if you want it. (tejal2210 AT gmail DOT com) SOLD

Here's the video if you missed it..

Or you can head to my You Tube Channel and watch it there.

And now if you've made it this far, I've got a mini challenge for you. Pick up whatever colors you've got....start coloring..make a project ( a card, a canvas, a tag, anything..not just the image) and link up below. I'll be giving away one set of the Bi-colors( set of 18) to one of you. If you've already got it, you can recommend a friend to whom I will send it.

Saturday, March 24, 2012

Cuttlebug and Stencil Tutorial

These tutorials are a product of extensive reading, researching and lots of time spent on making them. Please do not copy, or share on your page (for promoting your items in your shop) unless I give you permission to do so. Please ask nicely....I won't say no...but you need to ask.... You can link it on your blogs if you have used these tutorials...please share the link with me when you do use these tutorials...I would love to stop by and see what you have done!

I already have this post up at Pie Lane blog....but just posting it here for those who drop in here...Do drop in at the Pie Lane blog for some more inspiration!!
ETA- 
For Big shot users - the stack would be follows (This is only my research, someone will have to do it and tell me how well it works)
From bottom up
Tab 1 of the multipurpose platform
 Cutting Pad
 Metal Stencil
CS
Tan embossing mat/Silicone sheet
Impressions Pad ( link here)

Picture Heavy Post!! 

I have been struggling with  how to use the stencils...I didn't get a proper embossing for a long time...I could use it with with mists, I could get it to work with inks but the traditional embossing...zilch!!! So while stumbling around I finally found how I could use it..but before I tell you that...for those who want to try traditional method of embossing, here is a great tutorial on how to use your stencils with a light box (or use a glass table and put a lamp underneath your table)
Here's Sri showing you how to use a glass table and a lamp under it to use your stencils..(zoom in and you can see some new stencils!!)

But what I did was for gadget freaks like me!!! I used my Cuttlebug!! YES!! The cuttlebug works great with your Pie lane stencils!!

I will show you the cuttlebug stack later on, but first this is how the embossing looks!! That left me speechless!!!!

What can you do once you emboss it?  Place the stencil back on the embossed side...tape it down...and use a sponge and your inks to sponge it over....


The embossed part fits right in the grooves and takes inks very well....

That is Broken China distress ink....is that fabulous or what!!
You can also just rub a small ink pad right over the embossed area without the stencils.. This was with Fabriano Brustro CS...

I also tried with a bit of scrap of pattern paper!!

The paper is on the stencil...instead of removing the paper from the stencil, I just turned it over and inked it up!!


You can use either side for your projects!
I also tried with a scrap  piece of parchment paper (I'm still researching on parchment vs vellum)

So now you've seen what you can do with your Pie lane stencils...and the cuttlebug!!! Here is how to do it!


From the bottom, you use your
A plate
B plate
Stencil
paper (same size as the stencil - try not to use bigger)
Tan embossing mat (this is the secret to that fabulous embossing...you can use a rubber mat not a mouse pad , silicone baking  mat but the thickness has to be around 1.25-1.5mm)
B plate
and CS shims (very necessary)

The shims and the tan embossing mat (from Spellbinders.com) are the most important part of the embossing stack. You can vary the CS shims depending on your CS...for Fabriano I needed 3...but when I used the same 3 shims for the Pattern paper and parchment, the embossing tore the papers. Its a bit of trial and error on your part, but once you get hang of it....the whole world is open for you!! try whatever you can!! and Share with us!

When I used 3 shims, it  tore the paper, 2 would have been sufficient for thinner papers. I use the backing of the cuttlebug dies as shims...you can use thick chart paper, cereal box sheets, etc...one word of warning..if it feels tight when rolling throught the cuttlebug...it is tight...reduce the shim and try again. This is what I've discovered...if you find something new...do share in!

So hope I've inspired you to look at your stencils in a new way today....Do post any questions you have and I will post the answers here itself...so everyone can benefit.....

And coming soon...ways to use glitter with your stencil..

Yes!! I love glitter!!
Happy Crafting!!

Thursday, December 22, 2011

Pixie Dust Tutorial

These tutorials are a product of extensive reading, researching and lots of time spent on making them. Please do not copy, or share on your page (for promoting your items in your shop) unless I give you permission to do so. Please ask nicely....I won't say no...but you need to ask.... You can link it on your blogs if you have used these tutorials...please share the link with me when you do use these tutorials...I would love to stop by and see what you have done! 

I'm just re-posting the pixie dust tutorial from the Pie lane blog...Just for those who missed it there!!
 
Its going to be loads of photos...I could have done a video..but my camera decide it didn't want to film in the dark and cloudy and cold day today...so pictures it is for you!!
 My tools of trade....Double sided tape in different sizes....over here I have 1/4th inch, 1/2 inch, one inch and two inch tapes...tweezers, glitter, punches, and most important - baby wipes and a paint brush..and a large rough paper to collect glitter...I have a printer paper with me .

 Here I have the 2 inch double sided tape stuck to the paper...I usually scribble with a pen on the tape so that I know which side to stick back...
Peel off the backing...and save it...That is the most important sheet in this technique.
I tend to save scraps from other projects too. And keep your CS far away from glitter as possible while you're doing the next step.
I have punched out stars of different sizes from the backing paper..You can re-use them later on too...
Use your tweezers and start attaching them back on the sheet with the adhesive (double sided tape) Try very hard not to touch the sheet with your fingers..else the stickiness of the the tape will go away...

a picture of the whole sheet once covered in star peel offs!! Use your tweezer to stick them down properly.
Start pouring your base color glitter. This was my first mistake of the day....Never use light color glitter first...But as I learn .. you will learn....so continuing on..cover the whole sheet with transparent glitter...Wherever the star peel outs are there, the glitter will not adhere....


The most important part...Shake off the excess glitter and use your finger (sorry about that chipped nail..) to rub the glitter into the adhesive backed cardstock. Not too vigorously  but gently....rub all over the sheet and if necessary use a paint brush to brush off the excess.This rubbing motion sets the glitter in...and is called Burnishing.

 Here, I've removed a couple of the small star off...and poured glitter over only those areas...This is aqua color..again..pour, shake off the excess and rub over those area..

Work with one color at a time..I love how the blue-green glitter looks like a comet...its actually not..I'm just pouring it over the last of my stars...burnish and voila...the arrows show where the sticker has been peeled off and the adhesive of the tape is showing....

Your finished piece. Now you can see why it was a mistake to use the lightest color first? The darker colors have gone into the white and messed it up....but still its good!!! now this piece is ready to be used on a card...

And if you thought, that was all that I had to share..you're wrong!!! I've got some more!!

So here I start with a random scrap of CS that I had lying around...

I used my cutting mat as a guide and drew diagonal lines on it... (Mishtake number 2 of the day) use a very light hand while drawing these!!!

 Using those lines as a reference stick down 1/4th inch double sided take on teh whole sheet...know where I'm going with this? you'll see....

 Start adding green glitter on every 3rd line...work with one line at a time...use a paint brush to clean off in between and your wet wipes..


Then bring in color number 2..red..again every 3rd line with red...remove the backing, pour glitter, shake off the excess, use your fingers and burnish it and clean it with a brush...
 
Added the final and the 3rd color..transparent white...now see my mishtake? the pencil lines are visible through the white glitter...Your piece is ready to be used in a card....

And btw I'm still not done yet!!! Do you hate me by now?  Tee-heehee!! Promise this is the last!!!

 This is what happens when you keep the paper with the adhesive near glitter...its Contaminated!! I've just cut a butterfly out of the backing paper of the double sided tape....
ETA - I think I skipped a few steps over here...the piece on the right is a piece of 2x3 inch CS covered with the 2 inch double sided tape..and the backing has been peeled off...that's why you see the red glitter stuck to it.. The butterfly is cut out of the backing paper that I peeled off. 

Attach the butterfly to the card base, pour the color you want...burnish it very well and then with tweezers remove the butterfly backing...and this is what you get after removing the backing... the part that is white is still sticky, as there is the double sided tape under the blue glitter.. 
you can add transparent glitter at this point...but I was going for extreme contrast...so ..

Yeah, BLACK!!! Isn't that gorgeous...just add a magnet tape and you've got yourself a fridge magnet....

Here's after cutting the shape...and its ready to go on my fridge.

Hope you learnt something and will surely give this a try...simple tools...but dazzling results!! 

Any queries....shoot an email at Tejal2210 (AT) gmail (DOT) com.
Related Posts Plugin for WordPress, Blogger...