Friday, November 29, 2013

Obsessed with mosaics and butterflies!!

I truly am!! Obsessed...with the beauty of Mosaics and fluttery butterflies!! If I wasn't I wouldn't whip up 3 more mosaic cards featuring butterflies! hehe!!

So here they are!!

 This card had me in knots...I wanted opposite contrasts in each aspect of the card....the red panel on the left...has a black mat..and a black wing...but the inside of the butterfly is red...
And similarly on the right side...
It took me a  while to figure out how I wanted to do it...and then..it just came along fabulously!!

Sentiment is from a Technique Tuesday stamp...By Ali Edwards!!


These two are another that I whipped up....You can see and read step by step how to make these on the Crafter's Corner blog...Click here for the card on the left....and here for the card on right!

Hope you enjoy these crazy butterflies of mine!!

See you soon with some more madness!! 

Monday, November 11, 2013

Mosaic Butterfly

Hello people. Its been so long that I made a card for no reason at all. And after making one today...I really feel so glad. I wonder why I never took the time to do so.
I just watched a wonderful video from Jennifer mcguire. She made one with an outline die and one solid die. The only die that I had which could match those requirements was a butterfly one (huge grin :D)

So this is that card.
The shape is cut from reverse wonky rectangles.
Butterfly dies are memory box
Sentiment penny black.

Love the embossing of the frame. And the stain glass or mosaic look of the butterfly.
So what do you think? Do leave your comments. 

Friday, October 11, 2013

Celebrating Sindhu's Anniversary!!

Hey everyone...
sorry about the lack of posts on my blog...I will be updating it soon...But before I do that, I had to post this.

Sindhu Jay is celebrating her first Wedding Anniversary and her Blog Anniversary this month!! (her blog birthday was in June)
And she asked (not asked, demanded) that I host a challenge for her blog! And I couldn't say no!!!

So here I am with my challenge for you!!
"ABC - multiply it by 3 "

That's my challenge for you all....
Pick any letter of the alphabet....
Make a CAS Card and use any 3 elements that begin with that Alphabet.
Eg... if you pick S - you can use Sand, sunset, shine, ship, shimmer, etc

Go crazy, but let it still make sense. Please don't use R for rolled flowers.
Simple isn't it?

You can go over to her blog and link your cards there...

And for an inspiration...and a card just for her!!

 She loves this sentiment...and had asked me a long time ago to make a card using this set from Simon Says Stamps...Apothecary labels..
So the first card made with this Set is for you girl!!

The glitter frame is backed with black die cut to give a bit of shadow! 

In retrospect, this butterfly feels out of place, but I wanted to put it in....my newest Memory box Darla die! The Die is Spellbinders fleur di lis square, and is coated in Pixie dust glitter!

So this card uses the alphabet B - Blue, Bling and butterfly!!

Do hop over to Sindhu's blog, congratulate her and do join the challenges. There will be 4 in this month...and you can submit all October!!

Big big Hugs girlie...Wishing you and Prajay a very happy Anniversary month!! :D

Thursday, September 19, 2013

Quick Tip on Embossing

I just thought I'd do a quick post on something that was bugging me...and am not sure if any of you had the same problems as me.

Its about the long time taken to melt the embossing powder by my Ranger's Heat Gun. This is my 2nd heat gun...previously I had used the Marvy Uchida and that would melt the powder in seconds...but it would also blow the powder all over my work surface. Which was a pain to clean afterwards! :(

So I decided to pick the Ranger's Heat It, (I got mine from Crafter's Corner) knowing it was a low noise, less fan speed kind of a gun.
But with that low fan speed came a drawback...it takes longer to melt the powder...the longer I used it, the more surfaces under it I melted. The reason is that, this is low temp heat gun....and the others are high temp melt heat guns...that is why this heat tool takes longer!

Thankfully I saw in one videos that I watch endlessly at nights (am a night owl and an insomniac) and it popped that this was what I needed.. , and I think this is my perfect solution. So I thought of sharing it with you!

What I did was take an useless corrugated cardboard sheet (see hoarding helps!!) and wrapped the piece in aluminum foil .. roughly an A4 size cardboard. And attached two wooden pegs to it...No metal and no plastic please...metal will heat up and plastic will melt...wooden pegs only..

What ever needs to be embossed, goes under the peg...so that it does not fly away...


And how it helps...when you're heating from top, the foil also gets heated and heats the paper from below...making the process of melting your powders faster....Its such a relief to have them melt faster....plus with the cardboard under it I don't melt any of my surfaces!! 

And your work gets done in half the time!!! just showing my pretty peg pins!! 
 
I would recommend this heat gun any day, its small, versatile, and makes so less noise than the other heat guns...plus this version works on the Indian voltage!! What more do I want!!

Hope this little tip helps you!!

Friday, September 13, 2013

Blending with Faber Castell pencils and Odorless thinners

I finally managed to shoot part 2 of my Coloring with Faber Castell Bi-colors. In part 1, I showed you how to blend those waxy pencils with a blender pencil. You can watch it here...But those blender pencils are not easy to come by.

So I had set about searching for an alternative method, and it  took me so long, because I had to find local versions of  blending mediums...and I finally found it...and I love the results I got with it....What I am using are oil paint thinners...called OMS (odorless mineral spirits)

These thinners are called OMS because they are odorless...

Most of it is self explanatory when you see the video


I do have to give credit to Amy R of pariepaperink, from whose video, I got the idea of putting the sponge in a baby food jar.

Here are the samples that I colored in my video...I think I really like this method of blending the colors.
Even better than watercoloring!
What say?


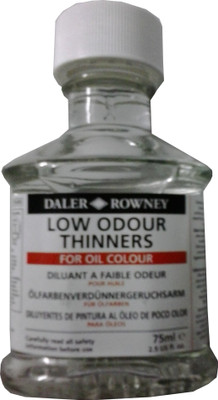
And here are the links to the various products I have mentioned. The Daler Rowney low odor thinner


Another substitue for this can be the Camlin Distilled Turpentine, but which as I said stinks a ton...It has a strong pine odor...if you don't mind that..you can pick that up too at your local stationary store. The camlin turpentine wouldn't be called an OMS because it has a strong smell or odor. 
 I'm just sharing the pics coz sometimes you may forget the names of the product, but you'll always remember the pictures!! :p

Also there is the Winsor  Newton Sansodor ..same as the Daler Rowney product..I haven't been able to find it anywhere here, but if you do get that, that's a good option too.

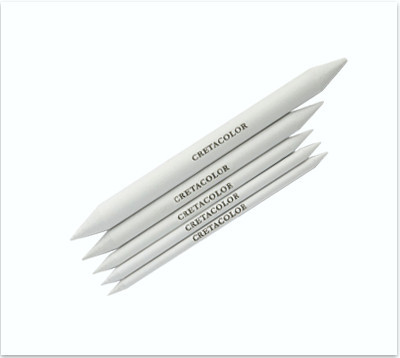
 Blending stumps/sticks (paper stumps) I have found mine in my local craft shop. If you can find, that's good, but you can also get the set from Creatacolor which is of a higher quality.  


Papers I use are Brustro 200 gsm (not 220 as I mention in the video) 

Hope you do try this method...
Feel free to leave your questions and of course, do leave your feedback. Which is what I thrive on!! 

So what next would you want to know...I'm searching for topics for my next videos....

Saturday, August 31, 2013

CAS cards - Part 3

Finally here with my last 4 CAS cards from the CAS card swap at Swap Central.


 This is perhaps my most favorite card, since I ended up CASEing myself. I made around 15 of these cards for Rakhi and to send to some special people!  ;)
The flower and sentiments are Papertrey ink. Colored with FC Bi colors, and the embossing folder is from Craft Concepts, which I picked from my local craft store!! (hehe!! S don't be jealous...you can come anytime to my LOCAL craft store!!)

 I loved creating the background so much, that nothing I put in the front seemed okay. Its made from woodgrain paper cut and distressed and re-glued such that it looks like beams.
The banner and sentiment is Simon says stamp.
The butterfly- a cheery lynn die.

 A very simple card...a faux polariod frame and a CASE of Nichole Heady's card using the same stamp. Stamps and sentiment are papertrey ink.

Love love love this die...my absolute CAS favorite. Pattern paper is from papermania-newsprint collection.
Sentiment and "Absolutely: Die is from Simon says stamp.
For such bold sentiments, I love using my Archival ink from Ranger. Crisp and bold as it should be!!

 Coming soon... a video on Lindy stamp gang!!

Saturday, August 24, 2013

CAS Cards Swap | Part 2

Hello...Today I'm sharing the next installment of my CAS cards from the Swap at Swap Central India.

This first one is a simple stamping!! This stamp was lying in my vault for the better part of 3 months! Finally had to ink it up and use it!
Hero arts Stamp, with an Itsy bitsy embossing folder in the BG. And some faux stitching.

And of course butterflies!!


This second card uses PTI stamp sets...Say it in Style (the thank you sentiment) and the flower and bottom sentiment are from Friend's til the end set.
Inks used are Memento inks.


This is another of my Pinterest inspired cards...I wanted some silver...since I had no silver...I went for pale grey...And those banner dies are awesome!! Really really love it!


So those are 3 more of my CAS card swap...Will share the last four soon!!
Have a great weekend everyone!

Thursday, August 22, 2013

CAS Cards Part 1

Heylo! I'm here to share a few of the 10 cards I made for Swap Central's CAS Cards Swap. I'll be sharing just 2-3 cards everyday...so I can explain the process and make sure the post doesn't go way long! :)


This is a Pinterest inspired card...I had to think of 10 cards in 10 days, (since my swap partner was in India for just a few days!) and my brain never works  that fast...so I had to turn to Pinterest for base ideas...and that is where I found the butterfly in square idea.
Had a hard time executing it, simply coz my punch is no longer sharp...it drives me nuts to punch one butterfly!

This card uses - Couture Creations embossing folder, from the Serenity collection - Ambrosia..
Square Scalloped die from Couture Creations, and butterfly punch from MS.
Sentiment from PTI.
The scalloped squares are mounted on foam pop up dots for dimension.


This is Card 2 with Pattern paper use!

A very simple card, from one of the techniques taught in Pattern Play class. The PP is Basic Grey figgy pudding...and the flower is Rose creations die. 
Some glitter and some pearls in the center.
The banner die and the sentiment on it are from the Tilted Banner die and greeting set from Simon says stamp. (Creativita Store)

Card 3 uses two of the stamp sets I wanted for a very long time...The musical background and the Delicate Blossoms. (Both from Crafter's Corner)

I've loved this set ever since I saw it....and finally after waiting for eons, bought it. But got to use it only after 2 months....And I've colored this using my Faber Castell Bi-colors with the technique I show in this video.
There isn't much to share about this card...its just simple stamping, and oh yes, the blooms are pieced.

 I colored them again separately on another CS and then cut and pasted them on this card.


 And just a little bit of glitter for the centre of the flowers.

Do let me know if there is any info you need...if not, just say hello in the comments! :)
See you soon with another set of CAS Cards.

Monday, August 19, 2013

Give-away Winners

Hey Sorry for the long absences. Crafting is happening ,  but in the background, and nothing that I can share right now! But Videos are happening fast and furiously!! I made a few and I hope you did find the time to check them out.

Here's one I did on just some basics of stamping...just to answer some beginner questions that I used to get quite frequently.

Or you can Check them on my YouTube Channel.

Also I was invited to review the newly launched, Mist-ries Spray Mists from Die Cuts and more. I did a Video review of those pretty colors and you can check them out on the Die Cuts and More TV ; here


And now.....Thank you to all of you who played with my Coloring Challenge.
The winnner....
.
.
.
.
.
.
.
.
.
.
.
.
.
is.....Megha Jain

And since there were just 4 entries, I've decided to give the other 3 participants a gift of Faber Castell Bi-colors too! So all of you please email me your address at Tejal2210 AT gmail DOT com.

Thank you once again for all your kind words on my videos!

See you soon! 

Tuesday, July 30, 2013

Info Post | Faber-Castell Bi colors and a give-away

With the advent of Facebook, blogging certainly takes a backseat. If its out there on facebook, its done.
I am determined to not follow the path taken by everyone, but instead make my own way...and yet sometimes I end up following the herd!! (shame on me!)
Anyways, this video went up last week on facebook and never got around to posting here.

I do not really enjoy coloring, but because images call out to be colored and I cannot do a shoddy job. It either has to be perfect or none at all...and hence went deep into finding what will give me the best results within the limited resources locally. I remembered my Faber-Castell bi color pencils....and tried and what superb results!!


Since I'm on a bright color roll, I love going bright..but you can do soft too...Will be showing that soon in another video!! yeah...me and videos and talking!!! Scroll down for the video. 


These are the colors I used along with the Derwent Blender pencils. Which unfortunately are not easily available. I'm sure I've found an alternative to it. Waiting for it for reach me....its in transit. However...I did manage to snag the one set of Derwent blender and burnisher pencil I found here....its for 365 for anyone who wants to buy it. Email me if you want it. (tejal2210 AT gmail DOT com) SOLD

Here's the video if you missed it..

Or you can head to my You Tube Channel and watch it there.

And now if you've made it this far, I've got a mini challenge for you. Pick up whatever colors you've got....start coloring..make a project ( a card, a canvas, a tag, anything..not just the image) and link up below. I'll be giving away one set of the Bi-colors( set of 18) to one of you. If you've already got it, you can recommend a friend to whom I will send it.

Wednesday, July 10, 2013

Info Post | Lindy's Stamp Gang - Mists

Yeah yeah....so the know-it-all is back...to share some more info on what is probably my most favorite-est product so far!! If it has glitter in it, I'm loving it! And with Lindy's products, you can be assured, there is such amazing glitter, you'd probably not wash your hands! I sometimes don't!! :p


So what are they? They are mists...mostly used in mixed media, but I use them everywhere! These mists have binders so that the glimmer won't rub off your product once they're dry. Its not chunky glitter. Its very very fine and shimmery!

4 types of Mists are listed, when you go the Lindy's Shop.

The FLAT FABIO's- The are just color sprays...intense colors but without any glitter (somewhat like the memento fireworks)

The STAR-BURSTS - my most favorite kind of sprays.....they have intense colors and subtle glitter....and amazing names!!  I love how they're named!!

Just some pics to show the amazing glitters on these...
Sprayed with mix of Baby Blue eyes Aqua, and Royal Peacock Fire

Pink is sprayed with Wild honeysuckle Coral Startburst, and the brown flower with Cactus Gold
3. Then comes the Vintage toned sprays....The MOON SHADOW MISTS - All the colors have a base of light or dark brown glitter....these colors are faab for those doing vintage projects...I have just bought my very first Moon Shadow mists, and will put up a review soon!

4. Last but not the least, the GLITZ SPRITZ... these are just pure shimmer mists, without any base color. The color is only of the glitter. These are the ones that I use the most! I love love the gold glitter spray!

Scintillating Silver!!

Cactus Gold...my very very favorite color

Scintillating silver over the wood-grain CS
So once you can make your mind up as to which colors to buy, then what? How do you use them?

The mists arrive as dry powders within the bottle (best thing they ever did, as it weighs less, you can buy more bottles). Here's a link from Lindy's, as Tracey shows you how to prepare your mists!
First shake up the bottle so that the powder isn't sticking to the bottom.

Fill warm/slightly hot water (preferable if you can use mineral or Purified water) upto the mark indicated on the label of the bottle.
And then Stir the color around with a wooden skewer or small stirrer...
Leave it for 10 mins. (Its hard...you want to spray and see, but have patience..watch some videos till then!)

You are ready to spray.
But, everytime you use it, you have to mix the glitter that settles on the bottom....for that you have to shake the bottle.
Try not to shake the bottle up and down a lot. You might end up clogging the nozzle. ( I have had one clogged nozzle in 2 yrs of using 6 sprays...and if you write to them about it, they send you free replacements)
Hold it between your palms and roll it, like you roll your nail polish bottles. or turn the bottle upside down, and whack the lower end on the edge of your palm! (Arlene shows how she does it in this video!)

And that's it...spray away like crazy!!

Will be back with more on Magical Micas and the Two Toned Embossing Powders, in the next post....and if you want color recommendations, comment below and I'll set you up with my favorite colors!!


A big big thanks to Shalini at Crafter's Corner for listening to my whims and getting this product!! I am over the moon!!

Monday, July 1, 2013

Some New Shares and Enabling! :D

So no crafting as of yet. Sad! very sad, but that means browsing like crazy and that's where I found these crazy things!! Pockets be ready to be emptied out!!

These are for the mixed media junkies....Gesso .. From the brand Golden.

Molding paste  from Golden. These is also something called as Light and Hard Molding paste. (gotta read what that is!)

This shimmering pearlescent medium from Dalery Rowney...mix with your acrylic colors for a shimmering effect!!

All the above stuff is FLAT 20% off!! hehe!! Wouldn't have recommended otherwise!!

Plus Copics on sale flat 20% off.. Look for the ones with Green Tag that says OFFERS!

And what have I brought? These iridescent colors!! They shine like crazy!!
Iridescent Green Blue, GreenBlue  and Violet Blue (I blame Saumya for this...she bought them and I was in love!! ) There are sooo many I want to buy though...See these here.

Phew so much goodness!!!

And did you see? Amazon is in India now!! Hurrah!! Can't wait till they expand their line to crafting goodies!! So far its books, Kindle and Music!! Can't wait!!

And last but not the least.....Check out the Swap, at Swap Central India,  I'm sure you'll be interested!!


Leaving you guys with a picture from my holidays!! don't check us, check out the background!! It was sheer heaven!! See you soon with some crafting stuff....and if you have anything that needs more info, email me...will give me something to search ! Toodles!

Tuesday, June 18, 2013

Blog Candy Winners!!

Now seems like a great time to announce the winners!! I just felt like it!! :D

So here are the lucky 4....please email me with your address and the prize you've won...I'll wait for 48 hours, if I don't hear from you, I will re-draw the names.

ANDDDDDDDDDDDD THE WINNNERS ARE......Using Random.Org

 the Fiskars Elegant Vines Stamp goes to - Pratiksha Sanghani 

The Summer wings stamp goes to - Ujjwal

The Papermania Black and white paper pack goes to -  Suman

And the Daisy and Dandelion paper pack goes to - Shylashree

All four prizes have been claimed. thank you for your prompt replies. 


Congratulations Everyone....please send me a quick email with you addresses, and your prizes shall be out in a jiffy!!!

Thank you everyone for all your support and best wishes!!

Wednesday, June 12, 2013

Info Post | Distress Markers Vs. Copics

I'm back....not really but needed something to post on my blog! So picked up a random topic I saw someone discussing and thought I'd do a post! Fancy me doing a post on this when I own neither Copics nor Distress markers! But here I am anyways!
If you wanna know where I'd disappeared to, here's a link to my personal blog...no more mixing crafting and my personal life. Yeah, Its another blog for me, but then who is counting! not me!! :D

So coming to the topic of my post. First of all, Distress Markers (DM) and Copics are way two different entities. You cannot compare them. They are as different as Tea and Coffee. They have nothing in common with each other, except that you use them as color mediums.
The first and foremost is one is a Water Based Marker, i.e the DM and the Copics are Alchol Based.
But in their own right, they're super heroes. Let me tell you what each is.

Distress Markers
Pic referenced from Tim Holtz Blog.
If you've used Distress inks, Distress stains, then you've used these inks. Only in a different form. DM have the same properties as Distress inks. i.e., they are reactive with water, blend-able, and basically work the same way as your Distress inks do. You can use a paintbrush and blend these fabulously.

Only that they are in a pen form, which gives you the added advantage of coloring with them and painting directly on stamps and stamping! I have seen bloggers used Distress ink refills and color images amazingly well....here's one of my favorite bloggers who does amazing work - Vera

Here is another in-depth review for these markers...Scrapbook Update.

Here's a fabulous tutorial on coloring with Distress Markers - Cards By Becky

And now Alcohol Based Markers
  Which includes a lot of markers...Copics (Original, Sketch and Ciao), Promarkers, Touch Twin Markers, Spectrum Noir, Sharpies, Bic-It Markers, and a new to the market - Finecolor Sketch Markers ( I have seen them in the Mumbai store that I visit...but yet to try them) 
These are all alcohol based, and very very vivid when coloring with them.

via Debbiehodge.com
I have a couple of markers from Promarkers and Touch twin markers (because I get them locally here!! heheh!!) I also own Sharpies and Bic-Its. I only use them for Flat coloring, no shading.

 And I would say, if you can, get 3 from each color shade or family...lightest, medium and darker shade. And then as you get advanced, build up your color collection.
Shading isn't possible with Sharpies or Bics ( you can to a little extent with Bics, but don't compare that to the shading you get from Copics)

There is a lot of info and reviews on Copics already done. And for me not having used them, I won't do a performance review. I'll leave that to the experts.
Here's some amazing tutorials on coloring with Copics - Pinterest

And if you think you can't color well with Touch Twin markers ( a shade cheaper than Copics, but awesome none the less!) Check out Dina's Blog and be prepared to be Wowed!

This is the most comprehensive FAQ's on Copics I've liked...there might be more. But I love Sharon's blog, so this gets posted on my  blog...Check it out here...

So I'll wrap up my post here!! And post in any questions if you have....since I won't be crafting for a while, I have all the time in the world to browse and get back to you!! :D

Sunday, May 5, 2013

Party Time!!

Here I was getting excited to cross the75k mark and when I checked, it had gone way past 75K and another 250 and counting!!! Whoop -Whoop!!
You guys are the bestest!!!!

So as promised here's my return gifts for being such awesome friends and followers (which BTW have crossed 200!!)

I'm giving away 4 candies...oh yes!! you heard me!! 4. They're not big candies, but just sweet enough!!

Here's the first one
1.) Fiskars 2x6 Stamp - Elegant Vines

2) Fiskars 2x6 stamp - Summer wings 
 
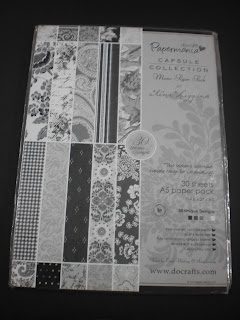
3) A5 Papermania Capsule collection, Black and white.
4)A5 Daisy Dandelion Picnic Patch...
So what you've gotta do!!

DO NOT SHARE THIS CANDY ON FB!! Yes! Do not. Feel free to mention in your blogs though....I personally find my timeline annoying with posts of candies so I would not want to push this on Facebook.

If you read my blog, you'll be here and that is more than enough for me.

Drop in your name in the inklinkz and I'll pick up 4 winners anytime in this month!! How's that for a change!!

I will however want the winners to contact me within 2 days or I will pick up a new name. 

I'll see you on the other side of May!! Take care and keep Cool!

Related Posts Plugin for WordPress, Blogger...